📋 Executive Summary
🔄 Workflow: Canva AI editing delivers the most reliable results when you duplicate the original, apply one local change at a time and inspect edges at 100% zoom before moving on.
🛠️ Tools: Magic Edit replaces content, Magic Eraser removes unwanted elements, Magic Grab repositions subjects and Background Generator rebuilds scenes.
📊 Evidence: A 2025 study of 83,000 real editing requests found that leading AI editors satisfied only about 33% of tasks to human standards, with precise identity preservation remaining a major challenge.
💳 Pricing: Canva Free allows up to 200 Standard or 20 Premium AI uses, while Pro increases this to 2,000 Standard, 200 Premium or 20 Ultra uses within the monthly allowance.
⚙️ Control: Magic Layers can break a single-page PNG or JPEG into editable components, but beta availability, segmentation errors and flattened photo detail can still affect the final result.
🎯 Decision: Use Canva for fast, campaign-ready edits and creative hand-offs, but switch to Photoshop or another specialist editor when pixel-level repeatability, colour-managed output or identity-critical retouching is essential.
I edit a photo with Canva AI by opening the image in Canva’s Photo Editor, duplicating the original, selecting the smallest suitable AI tool, and reviewing the changed area at full size before export. The sharpest reason to work this way is not speed but control: a 2025 analysis of 83,000 real-world editing requests found that leading generative editors satisfied only about one-third of requests to human standards, with precise identity-preserving edits proving harder than creative transformations. That finding explains why a one-click result can look impressive while still changing a face, product edge, reflection, label, or background detail that matters.
This guide explains how to edit a photo with Canva AI in 2026 without treating the platform as a black box. It covers Magic Edit, Magic Eraser, Magic Grab, Background Remover, Background Generator, Magic Expand, Magic Layers, conventional adjustments, plan allowances, export decisions, commercial rights, and the technical boundaries of Canva’s developer platform. It also separates actions that are reversible and deterministic from those that ask a generative model to invent pixels. That distinction is the foundation of a reliable workflow.
Canva’s advantage is its connected production environment. A photograph can move directly into a social post, presentation, advert, document, website graphic, or branded template. Its weakness is that convenient generative edits can still be probabilistic, region-limited, plan-limited, or unsuitable for evidence-sensitive work. The practical aim is therefore not to automate every decision. It is to reduce manual effort while preserving the parts of the image that must remain true.
What Canva AI Photo Editing Actually Includes
Canva’s photo-editing stack is not one model or one button. It combines conventional image adjustments, segmentation tools, generative replacement, generative removal, scene rebuilding, layout controls, and a growing set of layered-editing capabilities. The first editorial mistake is to call all of these actions “AI editing” as though they carried the same risk. Cropping and brightness changes are predictable. Background removal depends on segmentation. Magic Edit and Background Generator create new pixels. Magic Layers attempts to infer structure from a flattened image. Each category needs a different review standard.
The current platform is easier to understand as a ladder of intervention. At the bottom are safe, reversible operations such as crop, rotate, flip, filters, exposure, contrast, saturation, temperature, tint, highlights, shadows, sharpness, blur, vignette, and transparency. Above those sit selection-based tools such as Background Remover and Magic Grab. At the top are generative operations such as object replacement, scene extension, and synthetic backgrounds. The higher the intervention, the more closely the output should be checked for invented detail.
Canva’s own 2026 product direction reinforces this layered view. Canva AI 2.0 is designed to orchestrate multiple tools through conversation, while the standard editor remains available for direct object-level changes. Readers who need the wider context can review the full Canva AI feature stack, but the photo workflow still benefits from choosing one operation at a time rather than handing an entire image to an agentic instruction.
Cameron Adams, Canva’s co-founder and Chief Product Officer, described the problem behind Magic Layers plainly in March 2026: “You’d get a finished image you couldn’t edit, refine, or make your own.” His solution is meaningful, but it does not make every flat photograph equivalent to an original layered file. Texture, shadows, hair, reflections, and fine typography can still be merged in ways that resist clean separation.
| Tool | Primary Action | Pixel Behaviour | Best Use | Main Constraint |
| Adjust and Filters | Tone, colour, sharpness, blur | Modifies existing pixels | Global correction and styling | Can damage skin tones or clip highlights when overused |
| Magic Eraser | Remove an object or blemish | Generates replacement pixels | Small distractions on simple backgrounds | May repeat texture or leave shadow artefacts |
| Magic Edit | Add, replace, or modify a selected region | Generates new content from a prompt | Wardrobe, props, signs, local scene changes | Can alter nearby identity, lighting, or geometry |
| Magic Grab | Select and reposition a subject | Segments subject and reconstructs background | Moving people or products inside a composition | Edges, hair, contact shadows, and occluded areas |
| Background Remover | Separate foreground from background | Creates a subject mask | Product shots, portraits, transparent PNGs | Fine hair, glass, fur, smoke, and similar colours |
| Background Generator | Create a new scene behind a subject | Synthesises a background and blend | Campaign variants and product staging | Perspective, lighting direction, and scale mismatches |
| Magic Expand | Extend beyond the current frame | Outpaints new pixels | New aspect ratios and extra copy space | Architecture, repeated patterns, and edge continuity |
| Magic Layers | Convert a flat image into editable components | Infers objects, text, and layout layers | Reworking static graphics and AI outputs | Beta scope, segmentation errors, and limited true pixel recovery |
How to Edit a Photo With Canva AI: The Core Workflow
A dependable Canva workflow begins before the first AI command. Open the final design size, upload the highest-quality available source, and place the photo without immediately cropping away useful margin. Duplicate the page or image. Name the untouched version “Original” and keep it locked. This provides a visual baseline and prevents the common mistake of stacking several generative changes on the only copy.
Next, define the edit as one verb and one target. “Remove the red cup” is better than “clean up the table, improve the lighting, make it premium, and change the background.” Multi-part requests give the model permission to reinterpret the whole scene. A single local instruction makes failures easier to diagnose and undo. For readers starting from generated assets rather than photographs, the workflow for generate images inside Canva is related but not identical because generated images begin without a documentary original.
Use the least generative tool that can solve the problem. Crop before expanding. Adjust exposure before asking AI to relight. Use Background Remover before requesting a completely new scene. Use Magic Eraser for deletion and Magic Edit for replacement. Use Magic Grab when the subject should move but remain recognisable. This sequence reduces edit distance, meaning the number of pixels and decisions that must change before the photograph becomes publishable.
After each edit, zoom to 100% and inspect five zones: the edited centre, the mask boundary, high-contrast edges, repeated textures, and identity-bearing detail such as eyes, teeth, hands, logos, labels, jewellery, and product seams. Compare against the locked original. When the result is acceptable, duplicate again before the next generative pass. This branching method creates recoverable checkpoints and reveals exactly which step introduced a problem.
Finish with non-generative adjustments, then export a test file and reopen it outside Canva. A design that looks fine inside the editor can show compression, halos, soft text, or unexpected transparency after export. For high-stakes work, keep the editable Canva project, the original image, and the final exported asset as separate records.
- Open the final canvas size before editing.
- Upload the highest-resolution lawful source.
- Duplicate and lock the untouched original.
- Write one local edit instruction at a time.
- Choose the least generative suitable tool.
- Inspect boundaries and identity details at 100% zoom.
- Create a new checkpoint before every additional AI pass.
- Export, reopen, and verify the final file outside Canva.
Choose the Right Tool Before You Prompt
Most disappointing results begin with the wrong tool, not the wrong wording. Canva surfaces several controls in the same photo-editing environment, which makes it tempting to use the most novel option. A better approach is to classify the job by what must happen to the pixels. If the request is to improve existing information, use adjustments. If it is to isolate an object, use segmentation. If it is to invent missing information, use a generative tool and apply a higher review standard.
The distinction is particularly important for enhancement. Sharpening cannot restore detail that was never captured, and generative upscaling can create plausible texture rather than recover evidence. The site’s review of free AI photo enhancers is useful for comparing browser-first tools, but no enhancer should be described as recovering a true face, licence plate, medical feature, or product defect from a low-resolution source. It produces an interpretation.
Use the decision table below as a routing system. The first column states the actual desired change. The second identifies the Canva tool that introduces the least unnecessary invention. The final column defines the acceptance test. That final test matters because “looks good” is not enough for product, news, legal, property, or identity-sensitive photographs.
One of the most useful editorial insights is to separate “scene truth” from “design truth”. Scene truth concerns what was physically present, such as a person, product, building, or event. Design truth concerns whether the finished graphic communicates clearly. Canva is strong at design truth. When an edit changes scene truth, the operator must decide whether the output is an illustration, a reconstruction, an advert, or a documentary image and label it accordingly.
| Desired Change | Best Starting Tool | Prompt Needed | Acceptance Test |
| Improve brightness or colour | Adjust | No | No clipping, colour cast, or skin-tone shift |
| Remove a plain background | Background Remover | No | Hair, edges, shadows, and transparent areas remain clean |
| Delete a small distraction | Magic Eraser | No or minimal | Texture and lighting continue naturally |
| Replace one object | Magic Edit | Yes | Object scale, perspective, shadow, and material match |
| Move the existing subject | Magic Grab | No | Identity and contact shadow remain credible |
| Create a new environment | Background Generator | Yes | Lighting direction, horizon, depth, and subject scale align |
| Create extra space around the frame | Magic Expand | Optional | Repeated lines and patterns remain consistent |
| Rework a flattened graphic | Magic Layers | Optional | Text, objects, and hierarchy separate without distortion |
Prepare the Image Before AI Touches It
Preparation reduces the amount of invention an AI editor must perform. Start with the original file rather than a screenshot, social-media download, or image copied from a messaging app. Repeated compression creates block artefacts and blurred boundaries that confuse masks. For portraits, choose a frame where hair, shoulders, hands, and accessories are visible rather than cut off. For products, preserve a clean perimeter and any natural shadow that establishes contact with the surface.
Set the destination aspect ratio before generating new pixels. A square ecommerce card, a 16:9 article hero, a 4:5 social post, and an A4 flyer need different negative space. If the final format is known, place the photograph on that canvas first and decide where copy, logos, and calls to action will sit. This prevents the model from filling the only usable text area with visually important detail. Canva’s wider Canva AI image system is designed around this movement from asset to finished layout, which is where it often saves more time than a specialist editor.
Clean the source using deterministic controls first. Correct rotation, straighten the horizon, crop only obvious dead space, and make restrained exposure and white-balance adjustments. Avoid heavy sharpening before segmentation because halos around hair and product edges can be mistaken for real boundaries. If the source has sensor noise, reduce it before a generative edit where possible, since models may amplify noise into texture.
Create a working copy for each major intention, such as “background”, “object removal”, and “colour”. This is more reliable than one page with a long undo history. It also supports stakeholder review because each variant can be compared against the same original. In team settings, add a brief comment recording the purpose of the edit and whether the result is synthetic, retouched, or documentary. That practice is simple provenance even when formal content credentials are not part of the workflow.
Finally, confirm rights before upload. Canva’s AI Product Terms state that users are responsible for having the necessary rights and permissions for their inputs. A technically possible edit is not automatically a lawful one, especially with copyrighted images, private individuals, confidential products, or licensed library assets.
Replace or Add Objects Without Breaking the Scene
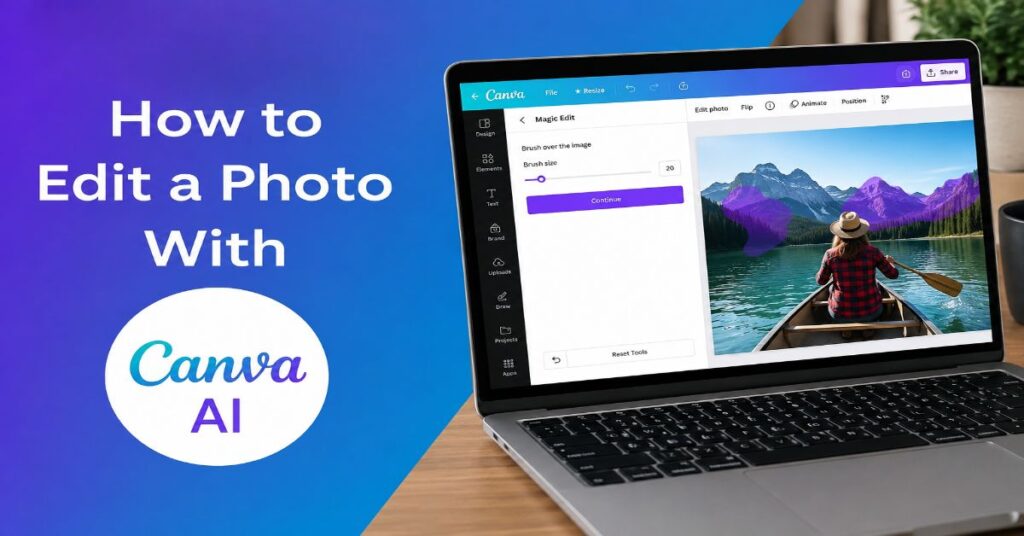
Magic Edit is Canva’s principal local generative replacement tool. The documented workflow is to select the photo, open the editing tools, choose Magic Edit, brush over the region, and describe what should be added or changed. The quality of the result depends less on poetic prompting than on the relationship among mask size, surrounding context, and the physical logic of the scene.
Use a perimeter-first mask. Trace slightly inside the object boundary before filling the centre. This reduces the chance that the replacement will inherit fragments of the original edge. Include the existing shadow only when the new object needs a different footprint. Exclude nearby faces, hands, text, and product labels whenever possible. A large brush is faster but gives the model more permission to redesign the scene.
Write prompts in the order of object, material, orientation, scale, lighting, and exclusions. For example: “Replace the mug with a small matte black ceramic cup, handle facing right, same position and size, soft window light from the left, no text or logo.” This is more controllable than “make it stylish”. Material and light terms help the new object belong in the photograph. Exclusions reduce common failures such as invented lettering.
Generate several variants, then assess the boundary rather than choosing by first impression. Look for incorrect perspective, floating objects, doubled shadows, warped fingers, reflections that do not match, and texture that spills into the background. Melanie Perkins told The Verge in April 2026 that one-shot generation is “the draft” and should be iterated and refined. That is the right standard for Magic Edit. A plausible first result is a candidate, not a final.
Avoid using Magic Edit for identity-critical facial changes, evidence alteration, regulated product claims, or exact typography. Those tasks require deterministic controls, specialist software, or a clearly labelled illustrative treatment. When the model repeatedly changes adjacent details, reduce the mask, simplify the prompt, or rebuild the composition with a separately generated object rather than forcing another in-place attempt.
How to Edit a Photo With Canva AI on Mobile
On mobile, the same logic applies even when tool placement differs. Zoom before brushing, use a stylus where available, and make shorter passes because finger masks tend to overshoot edges. Save after each accepted change, then review the exported file on a larger screen before publication. Mobile is suitable for rapid social assets, but fine hair, jewellery, typography, and product edges deserve desktop inspection.
Remove Objects and Retouch Without Visible Scars
Magic Eraser is designed for removal rather than replacement. Select the image, open Magic Eraser, and brush over the unwanted object. Canva’s May 2026 update said the tool had been improved to produce cleaner removals with fewer residual shadows and reflections. That is valuable for travel images, simple product scenes, and small distractions, but the background still determines how believable the fill can be.
The easiest removals are small objects surrounded by low-detail texture: a speck on a wall, a distant person against sky, a cable on a plain floor, or a blemish in an uncluttered area. The hardest involve repeated geometry, patterned fabrics, text, fences, architecture, water reflections, and objects that hide important background structure. Removing a chair leg, for example, also requires the model to infer the floor, wall, and shadow behind it.
Brush in separate passes. First remove the central object, then inspect the perimeter, then clean any leftover shadow. A single oversized mask can flatten nearby texture. Keep the brush just inside the visible edge where possible and let the model use surrounding pixels as context. If the tool creates a repeated patch, undo and rotate the sequence rather than enlarging the mask immediately.
For faces, use restraint. Minor temporary blemishes can be retouched for conventional portrait work, but changing facial structure, age, skin texture, or expression can quickly become misleading. Preserve pores and local contrast. A perfectly smooth face often looks synthetic because it removes the microtexture and tonal variation that communicate real skin.
For more specialised comparisons, the site’s guide to background removal tools shows why manual erase and restore controls remain important. Segmentation is not a solved problem. Hair, fur, lace, glass, smoke, and translucent packaging need edge correction. The acceptance test is to place the cut-out over both a light and dark background. Halos that disappear on one colour may become obvious on the other.
Change Backgrounds and Extend the Canvas
A new background is convincing only when four systems agree: perspective, scale, lighting, and contact. Canva’s Background Generator can create a scene behind a selected subject, while Magic Expand can invent content beyond the original frame. Both are useful for campaign variants, but they solve different problems. Background Generator changes the environment. Magic Expand preserves the centre and builds outward.
Begin by isolating the subject cleanly. Keep useful ground shadow when it supports realism, but remove shadows that belong to the old environment. Then describe the new setting with a horizon, camera height, lens feel, light direction, colour temperature, and depth. A prompt such as “minimal London studio, pale grey plaster wall, waist-height camera, soft north-facing window light from the left, subtle floor shadow, shallow depth of field” gives more physical guidance than “luxury background”.
Check whether the subject’s original light can plausibly exist in the new scene. A face lit warmly from the right will not sit naturally in a cool room lit from the left unless the background and subject are adjusted together. Similarly, a product photographed from above should not be placed into a straight-on room. When the mismatch is severe, choose a different source photograph rather than asking the model to repair incompatible geometry.
For expansion, reserve a crop-margin budget. Add only the amount of space the layout needs, inspect one side at a time, and avoid extending all four edges in a single pass. Architecture, shelving, tiled floors, railings, and typography often expose outpainting errors because parallel lines must remain consistent. Organic scenes such as sky, foliage, soft fabric, or shallow-focus interiors are more forgiving.
Pinterest’s 2026 Canvas research offers a useful industry signal. In online A/B tests, task-specific background enhancement and aspect-ratio outpainting systems produced 18.0% and 12.5% engagement lifts respectively. Those numbers do not prove a Canva edit will perform better, but they show why commercial teams invest in these workflows. The gain comes from use-case-specific quality control, not from indiscriminate generation.
Reposition Subjects and Recover Editable Structure
Magic Grab treats a subject as a movable element. Canva describes it as a way to select people or objects, then move, resize, or edit them while reconstructing the background. This can rescue a weak composition without fully replacing the subject. It is particularly effective when the subject has a clear outline and the hidden background is simple enough to infer.
Move subjects modestly. Large shifts reveal more unseen background and create greater reconstruction risk. Watch the contact point between shoes and floor, products and tables, or hands and props. If the subject casts a shadow, move or rebuild it so the lighting remains coherent. A cut-out that floats a few pixels above the surface will look wrong even when the mask itself is clean.
Magic Layers tackles a different problem: a flat PNG or JPEG in which text, graphics, and objects have been merged. Canva announced the public beta in the US, UK, Canada, and Australia in March 2026. The feature attempts to separate elements while preserving layout. It is most promising for posters, AI-generated designs, infographics, and campaign graphics, not for recovering a true photographic RAW workflow.
Cameron Adams said, “Generation is just the beginning. Real creative freedom comes from being able to edit without losing momentum.” That is a useful product principle, but operators should understand the technical boundary. Magic Layers infers editable structure. It does not recreate the original masks, adjustment layers, blend modes, colour spaces, or hidden pixels that existed before flattening. Text recognition can also fail when lettering is stylised, curved, low-contrast, or partially obscured.
Use Magic Layers on a duplicate, inspect every separated element, and compare the rebuilt hierarchy with the flat source. Lock elements that should not move. Replace critical text manually rather than trusting an inferred layer. For a broader view of professional options, the site’s review of AI tools for graphic designers explains where Canva’s speed fits beside specialist applications.
Correct Colour, Light, Texture, and Faces Safely
The best final polish often comes from conventional controls rather than another prompt. After generative work, use exposure, contrast, highlights, shadows, temperature, tint, vibrance, saturation, sharpness, blur, and vignette to unify the composite. Apply small changes and compare frequently with the original. Global adjustments can hide a seam, but they can also damage accurate product colours or skin tones.
Start with white balance. Neutral whites should not drift blue, green, or magenta unless the scene lighting supports it. Then set exposure and contrast while preserving highlight detail. Adjust shadows only enough to reveal information. Excessive shadow lifting creates grey blacks and emphasises AI-generated texture. Saturation should follow luminance correction because brightening an image can change the perceived intensity of colour.
For portraits, protect identity-bearing features. Eyes, eyebrows, nose shape, teeth spacing, hairline, scars, moles, and jewellery should be compared against the original after any generative step. A model may perform an unrequested “beautification” pass even when the prompt concerns clothing or background. The 83,000-request study by Taesiri and colleagues found that leading AI editors often struggled to preserve people and animals and sometimes made non-requested touch-ups. That is not a cosmetic issue when identity matters.
Use an edit-distance check before approval. Count how many unrequested changes are visible outside the target area. Zero is ideal. One minor tonal change may be acceptable for an advert. Any change to identity, brand mark, product geometry, evidence, or legally significant detail should trigger rejection or manual reconstruction.
For products, compare against a colour reference where possible. Canva is not a full colour-managed prepress environment, so print-critical work should be proofed in the downstream production system. For editorial and ecommerce use, preserve accurate labels, ports, buttons, stitching, and proportions. A polished image that misrepresents a product can create a customer-service or regulatory problem even when the graphic is visually strong.
Pricing, AI Allowances, and Hidden Commercial Limits
Canva’s 2026 pricing is more complex than a simple free-versus-Pro comparison because AI access is now a shared allowance across Standard, Premium, and Ultra tiers. Canva’s official pricing information lists up to 200 Standard or 20 Premium uses for Free, up to 2,000 Standard, 200 Premium, or 20 Ultra uses for Pro, and up to 4,000 Standard, 400 Premium, or 40 Ultra uses for Business and Enterprise. These are alternatives within a shared allowance, not three independent buckets.
The hidden operational point is that usage consumption varies by tool and quality tier. Canva says some interactions consume more of the shared allowance than others, and AI Design tools can sit outside the main allowance while remaining subject to fair-use limits. Allowances reset on the billing date. Annual subscribers still receive monthly resets, while shorter billing cycles may be prorated. Reaching a limit can produce pauses, slowdowns, or restrictions rather than a perfectly predictable hard stop.
Canva Business was announced at US$20 per person per month in October 2025, with no seat minimum. Pro pricing is localised and dynamically displayed by market and billing cycle, so a single globally valid public price could not be verified. Enterprise is quote-based, and Canva says larger teams receive discounted pricing. AI Pass is a recurring add-on for eligible paid plans, but the public page reviewed for this article did not display a universal fixed price. It advertises up to 40 times the Pro allowance and 20 times the Business allowance.
Commercial teams should budget for labour as well as subscription cost. The meaningful metric is cost per approved asset, not cost per generation. A cheaper plan can become expensive when limited allowances encourage rushed selection, or when repeated failures consume review time. Canva’s AI Product Terms also state that limits are operational controls rather than fixed entitlements and may change for performance, fairness, security, or reliability.
| Plan | Public Price Status | Standard AI | Premium AI | Ultra AI | Relevant Commercial Notes |
| Canva Free | £0 / US$0 | Up to 200 uses | Up to 20 uses | No access listed | Evaluation, light editing, fair-use restrictions |
| Canva Pro | Localised at checkout | Up to 2,000 uses | Up to 200 uses | Up to 20 uses | Solo creators, premium photo tools, dynamic market pricing |
| Canva Business | US$20 per person monthly announced; local pricing may vary | Up to 4,000 uses | Up to 400 uses | Up to 40 uses | No seat minimum, higher AI allowance, team and marketing features |
| Canva Enterprise | Contact Sales | Up to 4,000 uses | Up to 400 uses | Up to 40 uses | Custom contract, administration, security, support, potential AI indemnity conditions |
| AI Pass Add-On | Fixed universal public price not verified | Shared enlarged allowance | Shared enlarged allowance | Shared enlarged allowance | Up to 40x Pro or 20x Business allowance; eligible paid plan required |
Export Quality, File Handling, and Performance Bottlenecks
A successful edit can still fail at export. Choose the format according to destination: JPG for compact photographic web delivery, PNG for transparency or graphics that need crisp edges, and PDF for layouts moving into document or print workflows. Keep the editable Canva design rather than relying on the exported file as the master. A JPG or PNG is flattened and will not preserve the editability of elements inside Canva.
For web publishing, export at the actual display requirement or a controlled higher resolution, then compress in the publishing pipeline. Oversized files slow pages without adding visible quality. Reopen the exported image and inspect fine text, hair, transparent edges, gradients, and dark shadow detail. Check on both a light and dark background when transparency is involved. For print, verify bleed, final dimensions, colour expectations, and proof output with the printer.
Performance bottlenecks tend to appear in three places. First, large high-resolution images and complex multi-page designs increase editor memory use. Second, repeated generative passes can slow when the account approaches usage limits or when service demand is high. Third, browser extensions, unsupported browsers, or unstable network connections can interrupt uploads and exports. Canva’s troubleshooting guidance recommends checking feature availability, limits, and account conditions when AI tools appear missing or unresponsive.
For mobile work, save frequently and avoid making the only master copy on a device with limited storage or an unstable connection. For teams, standardise naming and versioning. A practical pattern is project-channel-purpose-version, such as “SummerCampaign-Instagram-Background-v03”. It prevents approved and experimental files from becoming indistinguishable.
Canva’s developer platform supports automated asset and design workflows, but it should not be confused with a public endpoint for calling Magic Edit on arbitrary pixels. Connect APIs can create and sync assets, designs, comments, exports, and template-based jobs. The Apps SDK offers Selection, Overlays, image replacement, asset upload, and a developing Design Editing API. The Canva AI Connector can create designs, autofill templates, find designs, and export files through supported assistants. These integrations automate the production system around editing, not every proprietary photo model itself.
Canva Versus Specialist AI Photo Editors
Canva is strongest when the photograph is one component of a finished communication asset. It combines editing, layout, templates, brand controls, collaboration, resizing, and publishing in one browser-first environment. Adobe Photoshop and Firefly provide deeper pixel, layer, mask, colour, compositing, and production controls. Midjourney is more suited to generative reinterpretation than faithful retouching. The correct choice depends on how much scene truth, repeatability, and technical precision the job requires.
Deepa Subramaniam, Adobe’s Vice President of Product Marketing for Creative Professionals, said in October 2025 that Adobe’s goal was to give professionals “more power, precision and control”. That language identifies the competitive boundary. Canva reduces interface and hand-off friction. Adobe prioritises specialist control. Neither advantage automatically wins every job.
The broader market is also moving towards editable generation. Adobe has added Prompt to Edit, partner models, generative fill, remove, expand, upscale, and layered image development. Google’s emerging image-editing products similarly focus on selecting parts of an image rather than regenerating everything. Canva’s differentiation is the direct route from edited asset to designed deliverable and the size of its template, collaboration, and brand ecosystem.
Use Canva when speed, accessibility, multi-format output, and team hand-off dominate. Use Photoshop or Firefly when exact masks, adjustment layers, colour-managed output, high-resolution compositing, or repeatable client revisions dominate. Use Midjourney when the requested change is really a new visual interpretation, not a faithful edit. Readers comparing generative systems can explore the site’s review of leading AI image generators.
A balanced workflow can use more than one tool. Generate or reconstruct a complex element in a specialist system, import it into Canva, and finish the layout, resizing, and brand application there. The risk is uncontrolled round-tripping, which can degrade resolution and lose provenance. Keep original files, document the model used for synthetic assets, and avoid repeated lossy exports.
| Criterion | Canva AI | Adobe Photoshop / Firefly | Midjourney |
| Best Fit | Campaign-ready design and fast team production | Precision editing, compositing, and professional finishing | Creative reinterpretation and visual exploration |
| Local Object Editing | Accessible brush and selection tools | Advanced masks, layers, partner models, and manual correction | Mask-based generative editing with less deterministic control |
| Layout and Publishing | Excellent, with templates and multi-format design | Strong but more application-specific | Limited final layout workflow |
| Colour and Print Control | Suitable for general design, limited specialist colour management | Strongest option for professional colour and print workflows | Not designed for colour-managed finishing |
| Identity Preservation | Requires close review after generative edits | Better manual correction path, still model-dependent when generative | Often changes identity and style |
| Collaboration | Simple browser-first sharing and comments | Mature cloud collaboration, more complex workflow | Community and generation workflow rather than document collaboration |
| Learning Curve | Lowest | Highest | Moderate for prompting, limited for precise production |
Commercial Rights, Privacy, and Responsible Disclosure
Canva’s AI Product Terms, effective 26 June 2026, place responsibility for inputs and outputs on the user. Users must hold the necessary rights, licences, and permissions for uploaded content. Canva states that users generally retain rights to their input and own output, but outputs that modify or incorporate licensed Canva content remain subject to the relevant content licence. Similar outputs may also be generated for other users.
The terms permit lawful use but warn that outputs may be inaccurate, non-unique, or unsuitable. They also prohibit removing or disabling provenance or metadata tags, including C2PA metadata, and prohibit misleading people that AI-generated content is human-generated. These conditions matter for publishers, advertisers, ecommerce sellers, schools, and agencies that may be tempted to treat a visually polished edit as self-authenticating.
Do not upload confidential photographs without reviewing organisational policy and Canva’s privacy controls. Canva may use technology partners for some AI functions, and the terms state that inputs may be shared with those partners for the purpose of providing functionality. Enterprise administrators should review access controls, retention, vendor terms, regional availability, and whether particular AI features are approved for client data.
Disclosure should match the risk. A routine colour correction does not need the same label as a reconstructed background or replaced product. For news and documentary contexts, disclose material changes and preserve the original. For advertising, ensure the edit does not misstate product dimensions, included accessories, finish, colour, performance, or environmental conditions. For portraits, obtain consent when changes may affect how a person is represented.
Melanie Perkins said in 2026 that “AI should accelerate your vision and creativity, not override it.” Responsible photo editing follows that principle. Human review is not a ceremonial final glance. It is the point at which someone accepts accountability for truth, rights, safety, and the consequences of publication.
A Repeatable Team Workflow for High-Volume Editing
High-volume editing needs a system, not a longer prompt. Build a small set of approved workflows by asset type: portrait, product, property, event, social campaign, and presentation. For each workflow, define the allowed tools, prohibited transformations, review checklist, export format, naming convention, and disclosure rule. This turns Canva from an ad hoc editor into a controlled production environment.
Start with a brief that separates fixed elements from flexible ones. Fixed elements might include identity, product geometry, logo, label text, legal copy, and brand colour. Flexible elements might include background, crop, decorative props, and non-factual atmosphere. The reviewer should know which category each element belongs to before generation begins.
Create a golden sample for each workflow. It should show the original, the approved edit, the prompt, the mask approach, and the export settings. New team members can reproduce the result and understand the quality threshold. When Canva changes a model or interface, rerun the sample. A tool update can improve one class of edit while changing another.
Measure approval rate, average attempts, average review time, and edit distance. Approval rate reveals whether prompts and source selection are improving. Attempts expose allowance consumption. Review time identifies where AI is creating hidden labour. Edit distance captures unrequested changes. These operational metrics are more useful than counting generations.
For social teams, connect the photo workflow to the publishing workflow. Canva’s templates, Brand Kits, resizing, comments, and export integrations can remove hand-offs after the image is approved. A related guide to edit a photo with Midjourney helps teams understand a generative-first alternative. The central decision is not which tool looks most advanced, but where each tool reduces risk and hand-off time. These links belong in the workflow discussion because the central decision is not which tool looks most advanced, but where each tool reduces risk and hand-off time.
Our Content Testing Methodology
This guide uses a documentation-led testing framework designed for feature tutorials. We cross-referenced Canva’s current Help Centre instructions for Magic Edit, Magic Eraser, Magic Grab, AI usage, and troubleshooting with Canva’s 2025 and 2026 newsroom announcements for Photo Editor, Canva AI 2.0, Magic Layers, and the May 2026 Magic Eraser update. Pricing and allowance figures were checked against Canva’s live pricing and AI-access materials, while commercial and provenance claims were checked against the AI Product Terms effective 26 June 2026.
Technical integration claims were verified against Canva’s Connect APIs, Apps SDK Design Editing API, Selection API, image-overlay guidance, export documentation, and AI Connector documentation. Competitive context came from Adobe’s official 2025 and 2026 product announcements. Performance and limitation findings were cross-checked against the 83,000-request everyday image-editing study by Taesiri and colleagues and Pinterest’s 2026 Canvas system paper. We did not present logged-in beta behaviour, local prices, or undocumented feature caps as universal facts where they could not be independently verified.
This article was researched and drafted with AI assistance and reviewed by the Sami Ullah Khan editorial desk at Perplexity AI Magazine. All data, citations, pricing figures, and named quotes have been independently verified against primary sources before publication.
Conclusion
Canva AI is now a capable photo-production environment, but its value comes from combining editing with layout, collaboration, brand control, and export rather than from replacing every specialist editor. The safest workflow is deliberately conservative: protect the original, choose the least generative tool, make one local change, inspect the boundary and identity details, then export and verify outside the editor.
The 2026 product direction is clearly towards conversational orchestration and editable generation. Canva AI 2.0 can coordinate more of the platform, while Magic Layers attempts to restore object-level control to flattened images. These changes reduce friction, yet they do not remove uncertainty. Generative edits remain probabilistic, usage allowances remain operational rather than guaranteed, and commercial rights still depend on the source image, licensed content, consent, and the truth of the finished representation.
The open question is not whether AI photo editing will become easier. It will. The harder question is how teams preserve provenance, repeatability, colour accuracy, identity, and accountability as the interface becomes more automatic. Canva is a strong answer for fast, campaign-ready work. It is not automatically the right answer for forensic, regulated, identity-critical, or colour-managed production.
Frequently Asked Questions
Can Canva AI Edit an Existing Photo?
Yes. Canva can edit uploaded or library photos using conventional adjustments, Background Remover, Magic Eraser, Magic Edit, Magic Grab, Background Generator, Magic Expand, and other tools. Availability depends on plan, region, account, and feature rollout. Generative edits should be checked for changes outside the selected area.
Is Magic Edit Available on Canva Free?
Canva Free includes limited AI access, but specific Premium or Ultra tools can require a paid plan or consume the smaller Free allowance. Canva’s current documentation lists up to 200 Standard or 20 Premium AI uses for Free and no Ultra access. Tool availability can change by account and region.
What Is the Difference Between Magic Eraser and Magic Edit?
Magic Eraser removes unwanted content and reconstructs the area behind it. Magic Edit adds, replaces, or modifies content using a text prompt. Use Eraser for deletion and Magic Edit when the selected region needs a new object, material, colour, or local transformation.
Does Canva AI Preserve Faces Accurately?
Not always. Generative editors can alter eyes, teeth, hair, skin texture, jewellery, or facial structure even when the requested change concerns another area. Compare the result against the original at 100% zoom and reject any unrequested identity change.
Can Canva AI Make a Photo Higher Resolution?
Canva offers enhancement and upscaling options, but generated detail is an interpretation rather than recovered evidence. Upscaling may improve perceived sharpness for design use, yet it should not be relied on to reveal true facial, legal, medical, security, or product information that was absent from the source.
What Happens When Canva AI Usage Runs Out?
Canva may apply pauses, slowdowns, or restrictions until the allowance resets. Usage resets on the billing date, and consumption varies by tool and quality tier. Eligible Pro or Business users may be offered AI Pass, but the add-on price and availability can depend on the account and market.
Can I Use Canva AI-Edited Photos Commercially?
Canva permits lawful use subject to its terms, the rights in the input, and any Canva library content licence. Users remain responsible for permissions, accuracy, disclosures, and claims. Commercial use should not misrepresent products, people, places, or documentary events.
When Should I Use Photoshop Instead of Canva?
Use Photoshop or another specialist editor when the job requires precise masks, adjustment layers, colour-managed output, repeatable compositing, RAW development, high-resolution retouching, or identity-critical corrections. Canva is usually faster when the edited photo must become a branded multi-format design.
References
Canva. (2026). Introducing Canva AI 2.0: Reimagining how the world creates.
Canva. (2026). Introducing Magic Layers, bringing creative control to AI content.
Canva. (2026). Understanding your AI usage.
Canva. (2026). AI Product Terms, effective 26 June 2026.
Canva Developers. (2026). Canva Connect APIs documentation.
Canva Developers. (2026). Design Editing API.
Patel, N. (2026, April 20). Canva’s CEO on its big pivot to AI enterprise software. The Verge.